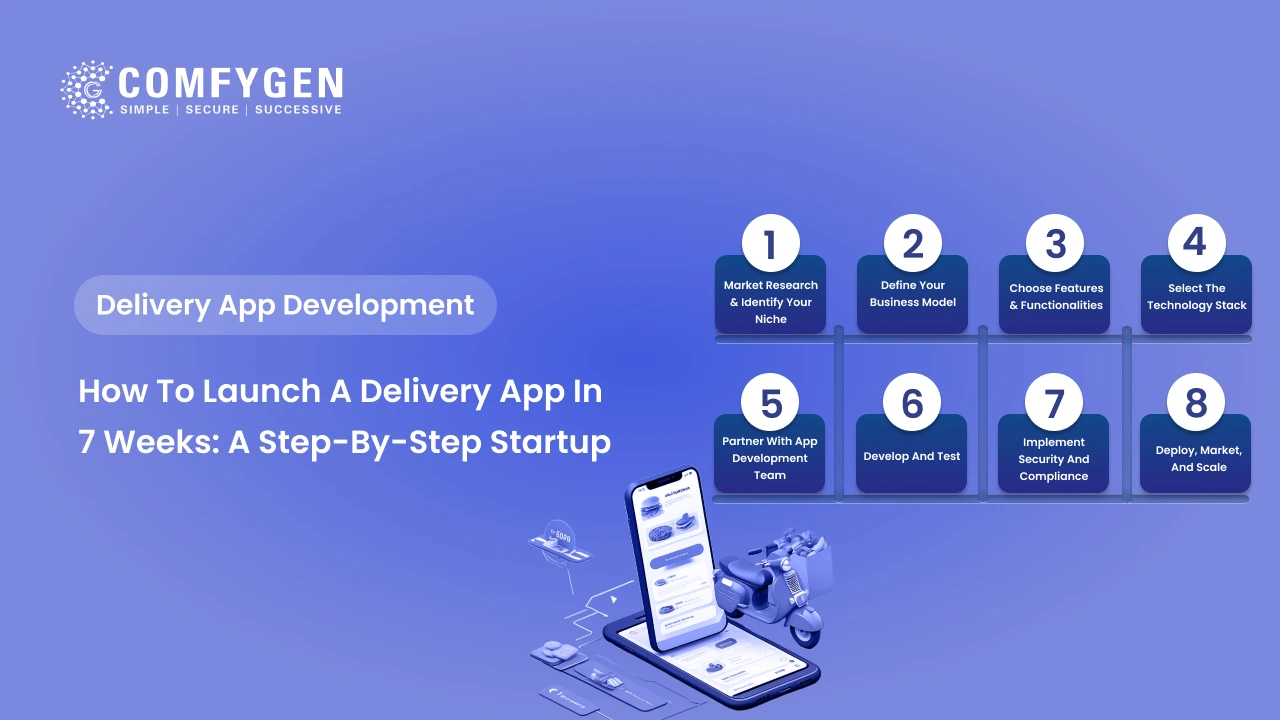





To launch a delivery app, choose one delivery model and one starting area, map every order step, build an MVP with a customer app, driver app, vendor panel and admin dashboard, and test the failure cases before you go live. Sign up stores and riders before customers, get app store approval, then soft launch in one zone. An MVP usually takes 8 to 12 weeks to build and costs $10,000 to $25,000.
This guide walks through all 12 steps, with a user-experience checklist for each app, the compliance rules to plan for, and the numbers to track after launch.
Quick Overview: 12 Steps to Launch a Delivery App
| Step | What You Do | Time |
| 1 | Choose your niche and business model | 1 week |
| 2 | Test demand before you build | 1 to 2 weeks |
| 3 | Plan your order flow and what can go wrong | 1 week |
| 4 | Choose the features for your first version | 1 week |
| 5 | Decide how to build your app | A few days |
| 6 | Design an easy-to-use app | 2 to 3 weeks |
| 7 | Build the app and connect key services | 5 to 7 weeks |
| 8 | Set up payments and follow legal rules | Runs alongside the build |
| 9 | Test the app in real-world conditions | 1 to 2 weeks |
| 10 | Get approved on the app stores | 1 to 3 weeks |
| 11 | Sign up stores and riders, then soft launch | 2 to 4 weeks |
| 12 | Track key metrics and keep improving | Ongoing |
Steps 6 to 9 overlap in practice, which is why a focused MVP takes 8 to 12 weeks from design to launch.
Step 1: Choose Your Niche and Business Model
Start narrow. “A delivery app” is too broad to launch well. “Daily milk delivery in three Jaipur neighbourhoods” or “30-minute grocery delivery in one part of Dubai” is specific enough to plan.
Then pick how you’ll make money. The three most common models are:
- Single store: You deliver your own products, like a restaurant chain or a bakery. No commissions to manage.
- Marketplace: Many stores sell through your app, and you take a commission on each order.
- Subscription: Customers pay weekly or monthly for repeat delivery, which works well for milk, water and meal plans.
Each model changes your features and costs, and the pros and cons of each delivery business model are worth weighing before you write a feature list.
Step 2: Test Demand Before You Build
Before spending on development, prove people will order. Cheap ways to test:
- Take orders on WhatsApp or a simple web form for two to four weeks.
- Run a small local ad campaign and count sign-ups for early access.
- Talk to 20 target customers and 10 target stores about what annoys them in current apps.
If you can’t get 50 to 100 real orders manually, an app won’t fix that. If you can, you’ll know which features matter most.
Step 3: Plan Your Order Flow and What Can Go Wrong
Every delivery app is built around the life of one order. Write down each state an order can be in:
| Order State | Who Changes It |
| Placed | Customer |
| Accepted or rejected | Store |
| Preparing | Store |
| Ready for pickup | Store |
| Rider assigned | System or admin |
| Picked up | Rider |
| Delivered | Rider |
| Cancelled | Customer, store or admin |
| Refunded | Admin or system |
Then list what happens when things go wrong. Most launch problems come from these cases:
- Payment succeeds but the order doesn’t reach the store
- The store rejects the order after payment
- An item is out of stock after the order is placed
- No rider accepts the order
- The rider can’t find the address or the customer doesn’t answer
- The customer cancels after the food is cooked
Decide in advance who pays in each case and what the customer sees.
Step 4: Choose the Features for Your First Version
A delivery platform is four apps working together. Keep version one small.
| Panel | Must-Have for Launch | Add Later |
| Customer app | Sign-up with phone OTP, browse and search, cart, payments, live tracking, order history, ratings | Loyalty points, subscriptions, group orders |
| Driver app | Order alerts, accept or reject, navigation, proof of delivery, earnings | Shift booking, incentives, in-app chat |
| Vendor panel | Order alerts, accept and mark ready, menu or stock updates, payouts | Promotions, analytics, multi-branch |
| Admin dashboard | Users, stores, riders, zones, commissions, refunds, basic reports | Dynamic pricing, demand forecasts |
Smart routing and ETA prediction can start with a maps API and grow later, since most AI features for delivery apps need a few thousand orders before they’re accurate.
Step 5: Decide How to Build Your App
| Route | Launch Time | Cost | Best For |
| SaaS delivery tool | Days | Monthly fee per order or user | Testing with low volume |
| White-label app | 2 to 6 weeks | Lower upfront | Standard models on a small budget |
| Custom build | 8 to 12 weeks for an MVP | $10,000 to $25,000 and up | Unique models or plans to scale |
A white-label delivery app gets you live fastest, while a custom build gives you full control over workflows. For cross-platform apps, Flutter or React Native lets one codebase run on both Android and iOS, which cuts build and maintenance costs.
Step 6: Design an Easy-to-Use App
Good design decides whether people finish their first order. Use this checklist for each app.
Checklist for the Customer App
- Let people browse before they sign up.
- Keep checkout to three taps or fewer for repeat orders.
- Show all fees (delivery, packing, taxes) before the payment screen.
- Let users drop a pin on a map, since many addresses in India and the Gulf are hard to type.
- Show live rider tracking with a clear ETA.
- Explain delays in plain words and offer an option, like waiting or cancelling.
- Keep a “Help” button visible on the order screen.
- Support Hindi or the local language if your market needs it.
- Test on low-cost Android phones and slow 4G connections.
Checklist for the Driver App
- Use large buttons that work with one hand and gloves.
- Make new-order alerts loud and hard to miss.
- Keep working when the network drops, and sync when it’s back.
- Show the next action clearly: go to store, pick up, go to customer.
- Make proof of delivery quick, with a photo or OTP.
- Show earnings for today and this week on the home screen.
Checklist for the Vendor Panel
- Play a loud, repeating alert for new orders until someone accepts.
- Let staff mark items out of stock in one tap.
- Show prep-time targets so stores know when riders will arrive.
- Make daily payouts and commissions easy to check.
Step 7: Build the App and Connect Key Services
Most delivery apps rely on the same core services:
| Need | Common Options |
| Maps and routing | Google Maps Platform, Mapbox |
| Payments | Razorpay, Stripe, PhonePe, Paytm, cash on delivery |
| SMS and OTP | Twilio, MSG91 |
| WhatsApp updates | WhatsApp Business API |
| Push notifications | Firebase Cloud Messaging |
| Hosting | AWS, Google Cloud, Azure |
Most of these charge by usage, so budget a monthly amount on top of the build. Ask your developers to show you working software every two weeks, and to give you access to the code repository from the first week.
Step 8: Set Up Payments and Follow Legal Rules
Plan these alongside the build:
- Data protection: India’s DPDP Act 2023 and Europe’s GDPR require clear consent for collecting personal and location data, and a way for users to delete their account.
- Food rules: In India, food platforms and every restaurant listed need valid FSSAI registration, with licence numbers shown in the app.
- Medicine rules: Pharmacy apps must verify prescriptions and work only with licensed pharmacies.
- Tax invoices: Create GST-compliant invoices for each order in India, or VAT invoices in the UAE and UK.
- App store payments: Because you sell physical goods and services, Apple and Google let you use payment gateways like Razorpay or Stripe instead of in-app purchases.
- Rider terms: Write clear terms for riders on payouts, insurance and account suspension.
Step 9: Test the App in Real-World Conditions
Lab testing isn’t enough for delivery apps. Before launch, run at least one full day of live test orders with real stores and riders. Check:
- Every failure case from Step 3
- Orders placed from areas with weak network signal
- Payment failures and refunds on UPI, cards and wallets
- 50 to 100 orders at once, to see how the system handles a rush
- Rider GPS accuracy in dense areas and tall-building zones
- Notifications on different Android brands, some of which block background alerts
Step 10: Get Approved on the App Stores
- Apple App Store: Reviews are often finished within a day or two, but rejections are common for missing privacy details, broken demo logins or unclear location permission messages. Give reviewers a working test account.
- Google Play: New personal developer accounts must run a closed test with at least 12 testers for 14 days before public release. Organisation accounts don’t have this rule, so register as a company if you can.
- Separate listings for each app: You’ll usually publish a customer app and a driver app, while the vendor panel may be an app or a web dashboard. Plan approval time for each.
Step 11: Sign Up Stores and Riders, Then Soft Launch
Customers leave fast if the app has few stores or slow delivery. Build supply first.
- Stores: Sign up enough stores that a customer in your launch zone sees real choice. For a food marketplace, 20 to 50 restaurants in one area is a common starting point.
- Riders: Recruit enough riders to cover your busiest hour, with a few spare. Train them on the app before day one.
- Soft launch: Open in one zone for two to four weeks. Invite friends, local groups and early sign-ups. Watch every order, fix issues daily, then expand zone by zone.
- Launch offers: Use a capped first-order discount and referral rewards that pay out only after a completed order, to limit coupon abuse.
Step 12: Track Key Metrics and Keep Improving
Track these numbers weekly for the first 90 days:
| KPI | What It Tells You | Healthy Early Sign |
| Order completion rate | How many orders arrive without cancellation | Rising week by week, above 90% |
| Average delivery time | Speed promise vs reality | Stable or falling as volume grows |
| ETA accuracy | Whether customers can trust your times | Most orders arrive within the shown window |
| Repeat order rate | Whether people come back | A growing share of orders from returning users |
| Store acceptance rate | Whether vendors respond quickly | Few orders rejected or ignored |
| Customer acquisition cost | Marketing spend per new customer | Falling as referrals and reviews grow |
| Support tickets per 100 orders | App and process quality | Falling after each update |
Checklist for After Launch
After the soft launch, keep this list running every month:
- Release small updates every two to four weeks, based on support tickets and reviews.
- Reply to every app store review in the first months.
- Update the app for new Android and iOS versions before they break it.
- Review store and rider performance and remove repeat problem partners.
- Add features from the “Add Later” column only when data shows people need them.
- Expand to new zones only when delivery times in current zones are stable.
- Budget 15% to 20% of the build cost each year for maintenance.
Most early failures come from the same handful of problems, and knowing the common delivery app development mistakes helps you avoid them before launch.
How Much Does It Cost to Launch a Delivery App?
A delivery app MVP usually costs $10,000 to $25,000 with an India-based team. Mid-level apps with multiple vendors and analytics cost $25,000 to $50,000, and advanced multi-city platforms cost $50,000 to $100,000+. Monthly running costs for maps, SMS and hosting come on top, and the full cost breakdown by feature shows where each part of the budget goes.
Founders who want one team to handle design, build, store approval and launch support often work with a delivery app development partner that has shipped food, grocery, medicine and parcel apps before. Comfygen has delivered 550+ projects for 400+ clients in 30+ countries since 2019, with 97% of clients returning.
Frequently Asked Questions
How do I launch a delivery app?
How long does it take to launch a delivery app?
How much does it cost to launch a delivery app?
What features does a delivery app need at launch?
What makes a delivery app user-friendly?
Should I launch in one city or many?

Mr. Saddam Husen, (CTO)
Mr. Saddam Husen, CTO at Comfygen, is a renowned Blockchain expert and IT consultant with extensive experience in blockchain development, crypto wallets, DeFi, ICOs, and smart contracts. Passionate about digital transformation, he helps businesses harness blockchain technology’s potential, driving innovation and enhancing IT infrastructure for global success.