Building an Ethereum smart contract can be simplified into seven easy steps. In this article,
We will define the Ethereum smart contract in 7 easy steps First we define the purpose and functionality of your Ethereum smart contract.
Next, we will define how to choose the appropriate development environment and tools. like Solidity for coding and Remix for testing. Then, begin coding your smart contract in Solidity that make sure it aligns with the Ethereum Virtual Machine standards. After coding, debug and test your contract thoroughly using tools like Remix and Truffle.
Lastly, interact with your deployed contract through various interfaces like web3.js or ethers.js, integrating it into your desired applications or dApps.
Let’s start this journey build an Ethereum smart contract in 7 easy steps in detail.
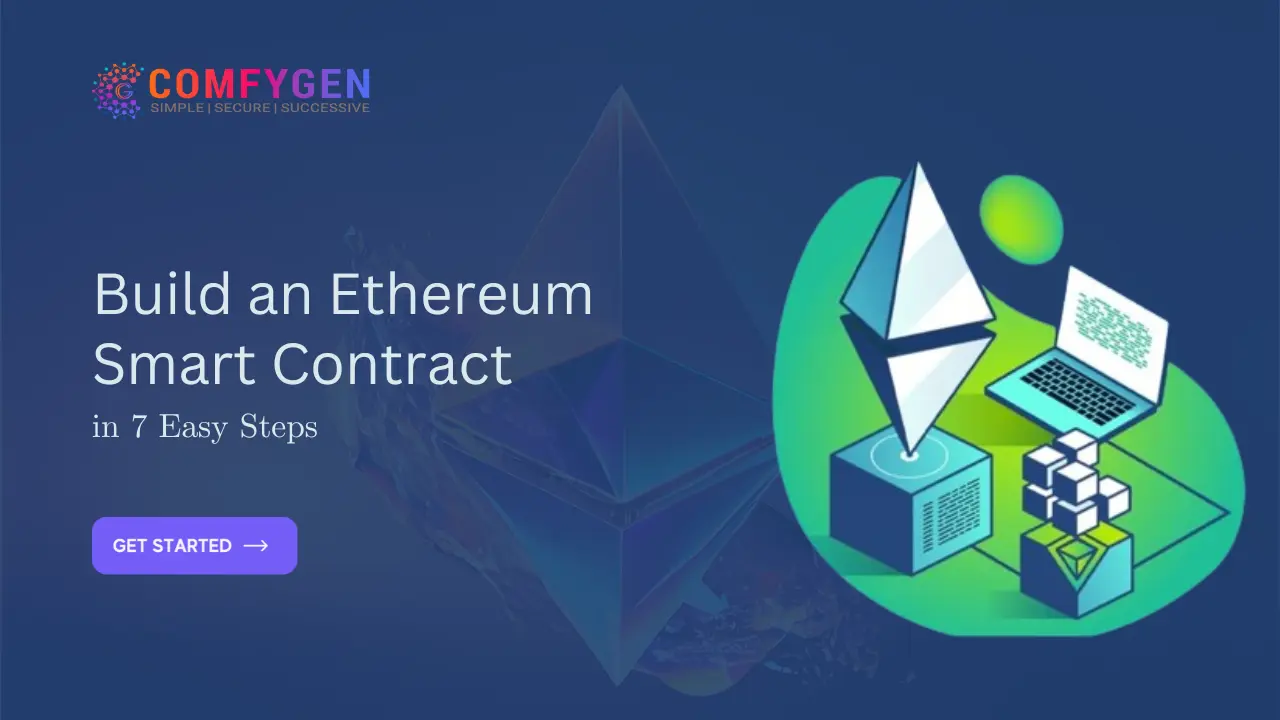
7 Easy Steps To Build An Ethereum Smart Contract
After knowing smart contracts and their platform, let’s start to know about 7 easy steps to build an Ethereum Smart Contract start with research, coding and Solidity proficiency.
1. Connect to the Ethereum network:
Start by connecting to the Ethereum network using the right client or service to interact with the blockchain development solution. When you have completed the setup, proceed to connect it to the Ethereum mainnet.
const Web3 = require('web3');

// Connect to the Ethereum network using Infura
const web3 = new Web3('https://mainnet.infura.io/v3/your_infura_project_id');

// You can also connect to your own Ethereum node
// const web3 = new Web3(new Web3.providers.HttpProvider('http://localhost:8545'));

// Check connection
web3.eth.net.isListening()
    .then(() => console.log('Connected to Ethereum network'))
    .catch(error => console.error('Unable to connect to Ethereum network:', error));

// Example: Get the latest block number
web3.eth.getBlockNumber()
    .then(blockNumber => console.log('Latest block number:', blockNumber))
    .catch(error => console.error('Error getting latest block number:', error));
In this example:
- We import the web3 library.
- We create an instance of the Web3 class and provide it with the URL of an Ethereum node to connect to. In this case, we’re using Infura, which provides Ethereum nodes as a service.
- We check if we’re connected to the Ethereum network by calling web3.eth.net.isListening().
- We get the latest block number using web3.eth.getBlockNumber().
Make sure to replace ‘https://mainnet.infura.io/v3/your_infura_project_id’ with your own Infura project ID if you’re using Infura, or ‘http://localhost:8545‘ with the URL of your own Ethereum node if you’re running one locally.
Also Read: Creating Your Own DApp with Ethereum Smart Contract Development
2. Use the Remix browser to write your smart contract:
You can use the Remix browser-based IDE for smart contract development in Solidity. Remix is the best option for writing smart contracts, a user-friendly interface for coding and testing smart contracts directly in your web browser.
// SPDX-License-Identifier: MIT
pragma solidity ^0.8.0;

contract SimpleStorage {
    uint256 private _data;

    // Function to set the data
    function setData(uint256 data) public {
        _data = data;
    }

    // Function to get the data
    function getData() public view returns (uint256) {
        return _data;
    }
}
To use this code in Remix:
- Go to the Remix IDE at https://remix.ethereum.org/.
- Create a new file and name it SimpleStorage.sol.
- Copy and paste the provided Solidity code into the file.
- Compile the code by clicking on the “Solidity Compiler” tab on the left side and then clicking on the “Compile SimpleStorage.sol” button.
- After successful compilation, switch to the “Deploy & Run Transactions” tab.
- Select an environment (e.g., JavaScript VM, Injected Web3, etc.) from the dropdown at the top right corner.
- Deploy the contract by clicking on the “Deploy” button.
- Once deployed, you can interact with the contract using the provided interface (e.g., set data, get data).
This contract is a simple example of a storage contract that allows you to set and get a single unsigned integer value.
3. Deployment On The Public Ethereum Test Network:
First, deploy your smart contract on a public Ethereum test network like Ropsten or Rinkeby to test its functionality and behavior in a real-world environment without using real Ether.
4. Code Understanding
Familiarize yourself with Solidity, the programming language for Ethereum smart contracts, to understand how to write your contract’s logic.
5. A sample smart contract code to create ERC20 tokens
Consider incorporating a sample ERC20 token code into your smart contract. ERC20 is a standard interface for fungible tokens on the Ethereum blockchain, widely used for token creation and management.
// SPDX-License-Identifier: MIT
pragma solidity ^0.8.0;

contract ERC20Token {
    string public name;
    string public symbol;
    uint8 public decimals;
    uint256 public totalSupply;
    mapping(address => uint256) public balanceOf;
    mapping(address => mapping(address => uint256)) public allowance;

    event Transfer(address indexed from, address indexed to, uint256 value);
    event Approval(address indexed owner, address indexed spender, uint256 value);

    constructor(string memory _name, string memory _symbol, uint8 _decimals, uint256 _initialSupply) {
        name = _name;
        symbol = _symbol;
        decimals = _decimals;
        totalSupply = _initialSupply * 10 ** uint256(_decimals);
        balanceOf[msg.sender] = totalSupply;
    }

    function transfer(address _to, uint256 _value) public returns (bool success) {
        require(_to != address(0), "ERC20: transfer to the zero address");
        require(balanceOf[msg.sender] >= _value, "ERC20: insufficient balance");

        balanceOf[msg.sender] -= _value;
        balanceOf[_to] += _value;

        emit Transfer(msg.sender, _to, _value);
        return true;
    }

    function approve(address _spender, uint256 _value) public returns (bool success) {
        allowance[msg.sender][_spender] = _value;

        emit Approval(msg.sender, _spender, _value);
        return true;
    }

    function transferFrom(address _from, address _to, uint256 _value) public returns (bool success) {
        require(_from != address(0), "ERC20: transfer from the zero address");
        require(_to != address(0), "ERC20: transfer to the zero address");
        require(balanceOf[_from] >= _value, "ERC20: insufficient balance");
        require(allowance[_from][msg.sender] >= _value, "ERC20: insufficient allowance");

        balanceOf[_from] -= _value;
        balanceOf[_to] += _value;
        allowance[_from][msg.sender] -= _value;

        emit Transfer(_from, _to, _value);
        return true;
    }
}
To deploy and interact with this contract:
- Go to the Remix IDE at https://remix.ethereum.org/.
- Create a new file and name it ERC20Token.sol.
- Copy and paste the provided Solidity code into the file.
- Compile the code by clicking on the “Solidity Compiler” tab on the left side and then clicking on the “Compile ERC20Token.sol” button.
- After successful compilation, switch to the “Deploy & Run Transactions” tab.
- Select an environment (e.g., JavaScript VM, Injected Web3, etc.) from the dropdown at the top right corner.
- Deploy the contract by clicking on the “Deploy” button.
- Once deployed, you can interact with the contract using the provided interface (e.g., transfer tokens, approve spender, etc.).
Also Read: How Much Does It Cost To Build Erc 20 Tokens?
6. Add some dummy Ethers to your wallet:
Make sure you have some dummy Ether in your MetaMask wallet to test the smart contract and cover transaction fees and contract deployment costs on the test network. Add some dummy Ethers to your wallet. Click on the “Deposit” button and the “Get Ether” button under Test Faucet.
const fetch = require('node-fetch');

async function requestTestEther(address, faucetUrl) {
    try {
        const response = await fetch(faucetUrl, {
            method: 'POST',
            headers: {
                'Content-Type': 'application/json',
            },
            body: JSON.stringify({ address: address }),
        });
        const data = await response.json();
        if (response.ok) {
            console.log('Test Ether successfully requested:', data);
        } else {
            console.error('Failed to request test Ether:', data);
        }
    } catch (error) {
        console.error('Error requesting test Ether:', error);
    }
}

// Replace address with your Ethereum address
const yourAddress = '0xYourAddress';
// Replace faucetUrl with the URL of the faucet for the desired test network
const faucetUrl = 'https://ropsten-faucet.com/donate/yourAddress';

requestTestEther(yourAddress, faucetUrl);
Make sure to replace ‘0xYourAddress’ with your actual Ethereum address and ‘https://ropsten-faucet.com/donate/yourAddress’ with the URL of the faucet for the desired test network.
This code sends a POST request to the faucet URL with your Ethereum address as the request body. The faucet will then send test Ether to your address.
7. Deploy the Smart Contract:
Deploy your smart contract to the test network using Remix or other deployment tools. Once deployed, you can interact with your contract and test its functionality as desired of the Remix browser.
const Web3 = require('web3');
const fs = require('fs');

// Connect to an Ethereum node provider
const web3 = new Web3('https://ropsten.infura.io/v3/your_infura_project_id');

// Load the compiled contract ABI and bytecode
const contractABI = JSON.parse(fs.readFileSync('YourContractABI.json', 'utf8'));
const contractBytecode = '0x' + fs.readFileSync('YourContractBytecode.bin', 'utf8');

// Create a contract instance
const contract = new web3.eth.Contract(contractABI);

// Deploy the contract
const deployContract = async () => {
    try {
        const accounts = await web3.eth.getAccounts();
        const deployedContract = await contract.deploy({
            data: contractBytecode,
            arguments: [/* constructor arguments if any */],
        }).send({
            from: accounts[0],
            gas: '4700000', // Adjust gas limit as needed
            gasPrice: web3.utils.toWei('20', 'gwei'), // Adjust gas price as needed
        });

        console.log('Contract deployed at address:', deployedContract.options.address);
        return deployedContract;
    } catch (error) {
        console.error('Error deploying contract:', error);
    }
};

// Call deployContract function
deployContract();
Make sure to replace ‘https://ropsten.infura.io/v3/your_infura_project_id’ with your Infura project ID or the URL of your Ethereum node provider. Also, replace ‘YourContractABI.json’ with the path to your contract’s ABI file and ‘YourContractBytecode.bin’ with the path to your contract’s bytecode file.
This code will deploy your smart contract to the Ropsten test network using Infura as the node provider. Adjust the gas limit and gas price according to your requirements. After successful deployment, it will log the deployed contract address.
Ready to Build Your Smart Contract on Ethereum?
How Smart Contracts are Executed on The Ethereum Platform
Smart contract is automatically executed when specific conditions are met which involves nodes on the network competing to solve complex mathematical puzzles in order to validate and add new transactions to the blockchain development. Once a block containing a smart contract transaction is mined and added to the blockchain. Every node on the network executes the code of the smart contract to ensure its validity and consistency. This execution occurs in a decentralized manner, with each node independently running the contract code and updating the state of the Ethereum Virtual Machine accordingly. The execution results are then recorded on the blockchain development making them immutable and transparent.
Also Read: Smart Contracts and Blockchain: A Powerful Combination for Business Applications
Top Smart Contract Platforms To Consider in 2024
Ethereum
Ethereum is a decentralized blockchain platform that starts a peer-to-peer network facilitating the secure effecting and verification of smart contracts that enable participants to transact without a central authority. Its suffer leadership in the smart contract field stems from its early adoption, the Ethereum blockchain developer community, and an expensive array of decentralized applications (dApps). While scalability difficulty keeps. Ethereum’s coming upgrades especially Ethereum 2.0 are ready to deal with these challenges that promising increased efficiency and scalability for its expansive ecosystem.
Solana
Solana blockchain platform that was founded in 2017. Solana ecosystems are organized smart contracts programs as on-chain accounts. Every storing executable logic is divided into different functions known as instructions. Using its unique consensus mechanism, Proof of History, Solana has collected substantial attention due to its remarkable throughput and minimal transaction fees. This feature set has positioned Solana as an appealing choice for decentralized finance (DeFi) development initiatives and NFT marketplace development where fast transaction processing is compulsory for best performance and user experience.
Read More: How to Build Deploy dApp on Solana Blockchain?
Binance Smart Chain
Binance Smart Contracts is a blockchain platform that offers potential benefits like low transaction fees, fast transaction speeds and high scalability. BSC was developed as a scalable and efficient alternative to existing smart contract platforms like Ethereum Blockchain, BSC has swiftly risen in mainly within the blockchain development solution. Using its compatibility with the Ethereum Virtual Machine (EVM), BSC enables seamless migration of Ethereum-based projects that make sure faster transaction processing and reduced fees. This interoperability coupled with Binance’s established reputation and user base, positions BSC as a captivating option for developers seeking increased scalability and cost-effectiveness in their decentralized applications.
Stellar
Stellar doesn’t feature an immerse smart contract language or virtual machine which require a different approach to code smart contracts or streamline contract logic for functionalities. Even so, a Stellar smart contract expertly merges transactions while navigating through various limitations to achieve calculated results. Stellar blockchain make sure operating within a network of interconnected nodes collaborate to uphold the blockchain’s integrity. This cooperative system facilitates secure and efficient transaction flow along with declarations of trust which encourage a strong ecosystem for Stellar users.
Hyperledger
Hyperledger an open-source creativity facilitated by the Linux Foundation that provides a full suite of blockchain technologies and tools designed for enterprise applications. Its modular architecture enables the construction of permissioned enterprise-grade blockchain development solutions that provide to specific organizational requirements. Hyperledger’s importance on privacy, security and scalability make sure strongest in handling sensitive data and high transaction volumes. The framework comprises different layers a consensus layer for establishing agreement on transaction order and validity within blocks, a smart contract layer for processing and authorizing transactions and a communication layer for managing peer-to-peer message exchange. This layered approach make sure efficient and reliable blockchain operation which making Hyperledger blockchain development a favored choice for businesses seeking customized blockchain solutions.
Read More: A Comprehensive Guide from a Leading Hyperledger Blockchain Development Company
Cardano
The Cardano blockchain platform emphasizes sustainability and scalability. It uses a layered architecture which allows for greater scalability. Cardano Smart Contracts programs written on the Cardano blockchain platform using the Plutus language with transactions serving as both input and output. Cardano smart contracts are automatically executed when specific conditions are met. Cardano’s goal is to provide a scalable and sustainable blockchain infrastructure through its layered architecture and proof-of-stake consensus mechanism.
Also Read: How to Choose a Blockchain Platform for your Business
What Are The Tools And Technologies Required For Implementing Ethereum Smart Contracts?
To implement Ethereum smart contracts, you will need a few tools and technologies. Here are some of the most important ones:
Ethereum Network
Ethereum is a decentralized platform that runs smart contracts. You will need to connect to the Ethereum network to deploy and execute your smart contracts.
Solidity
Solidity is a programming language used to write smart contracts on the Ethereum platform. It is a high-level language that is similar to JavaScript and is specifically designed for smart contract development.
Read More: A Comprehensive Guide on Blockchain Development Process and Tools
Remix
Remix is an IDE (Integrated Development Environment) for writing and testing smart contracts. It provides a web-based interface for writing, deploying, and testing smart contracts on the Ethereum network.
Truffle Suite
Truffle is a development environment, testing framework, and asset pipeline for Ethereum. It provides a suite of tools that allow developers to create, test, and deploy smart contracts more easily.
Ganache
Ganache is a local development blockchain that can be used for testing and debugging smart contracts. It allows developers to simulate an Ethereum network locally, without having to connect to the main Ethereum network.
MetaMask
MetaMask is a browser extension that allows users to interact with the Ethereum network from their web browser. It provides a secure wallet for storing Ether (ETH) and other ERC-20 tokens, as well as a way to interact with Ethereum-based decentralized applications (dApps) development.
Infura
Infura is a web API that provides access to the Ethereum network. It allows developers to connect to the Ethereum network without having to run a full node.
IPFS
InterPlanetary File System (IPFS) is a decentralized file storage system that can be used to store large files, such as images or videos, on the Ethereum network. It is often used in conjunction with smart contracts to store data off-chain.
Build an Ethereum Smart Contract in Solidity
Final Words
Building an Ethereum smart contract in seven easy steps with defining your contract’s purpose and functionality. Then, you write the Solidity code for your contract, make sure it complies with best practices and security considerations. Next, you test your contract thoroughly using tools like Remix or Truffle, simulating various scenarios to make sure its reliability.
In this article, we have covered the all important steps to build an Ethereum smart contract in easy way with code examples. we have defined smart contracts and their top platforms in detail. Thus, From these steps, you can create strong and effective Ethereum smart contracts to power your decentralized applications and transactions.

Mr. Saddam Husen, (CTO)
Mr. Saddam Husen, CTO at Comfygen, is a renowned Blockchain expert and IT consultant with extensive experience in blockchain development, crypto wallets, DeFi, ICOs, and smart contracts. Passionate about digital transformation, he helps businesses harness blockchain technology’s potential, driving innovation and enhancing IT infrastructure for global success.
Based on Interest

Cloud Kitchen Management Software Development: Features, Process, Cost & Compliance Guide
Quick Summary: Cloud kitchen management software development brings order aggregation, kitchen display systems, inventory tracking, and analytics into one dashboard, replacing the…